History: EclipseCVSbranches
Preview of version: 6
Tikiwiki Branch Checkout with Eclipse
This page shows you how to checkout a certain CVS Branch of tikiwiki with Eclipse
It is not very intuitive but it is very useful and a must for those working with Eclipse.
That's why I decided to put this page up.
I am assuming you already have Eclipse setup and working with the latest tikiwiki HEAD checked out. If you have not gotten this far yet. Do a search here for the pages that can get you that far.
The picures are large but explain it well
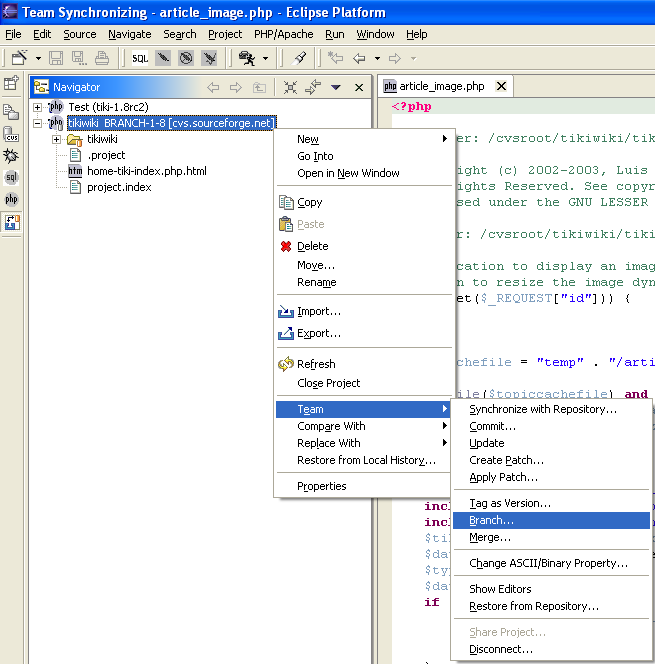
First you must tell Eclipse about the new branch.
Right click on your tikiwiki project and follow the menues below.

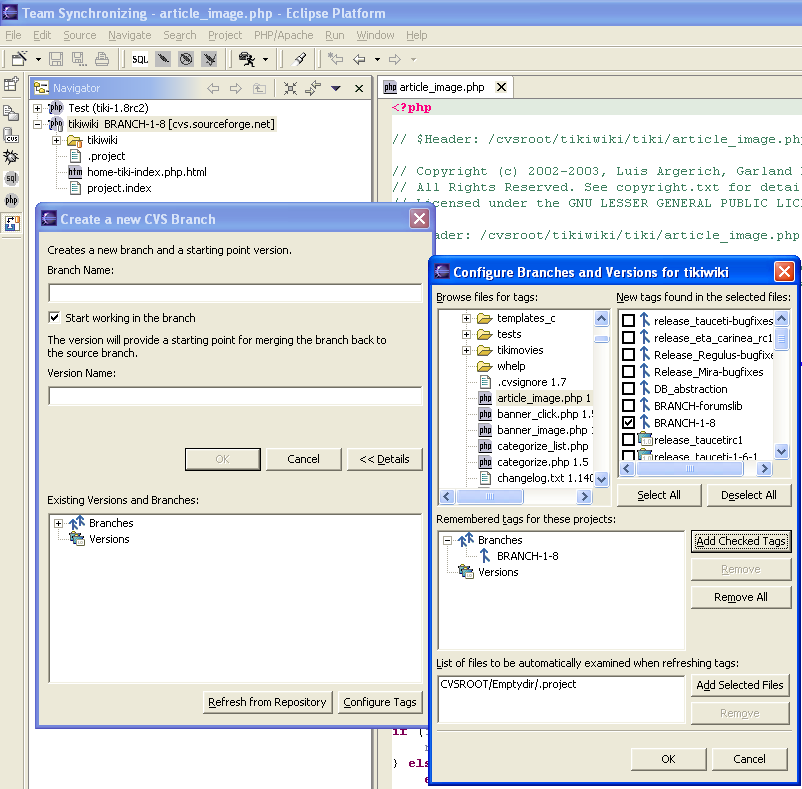
- Click "Details"
- Click "Configure Tags"
- Browse the tiki directory to the first PHP file and select it.
- All the versions and branches should appear for that file on the right.
- Select "Deselect All"
- Check off the Branch you are interested (i.e. BRANCH-1-8)
- Click "Add Checked Tags"
- Click OK
- Finish up by naming your Brank and clicking OK again.

Now it's time to update your files with the new Branch you selected.
NOTE This proceedure will delete all files in your project directory no matter if they are part of the CVS tree or not. If you have any files you want to save, back them up now.
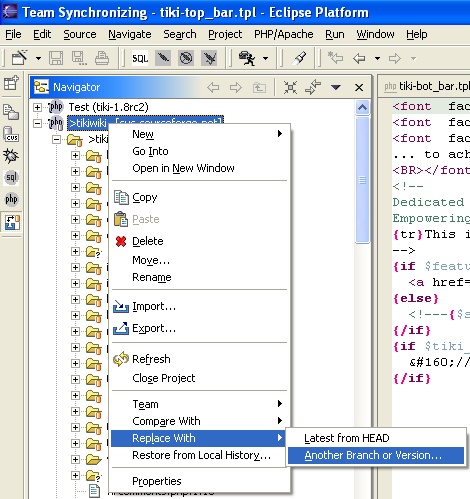
Now
- Click right on your tikiwiki project
- Click "Replace with"
- Click "Another Branch of version"
- Select your Branch and follow the steps.
- You may have to delete the contents of you template_c directory manually if you get errors that it can not delete these files. Otherwise you're done.
